Set up single sign-on with SAML and OneLogin

You can use single sign-on in Timetastic using OneLogin as your identity provider.
Note: auto-provisioning is not supported by Timetastic.
Step 1. OneLogin setup
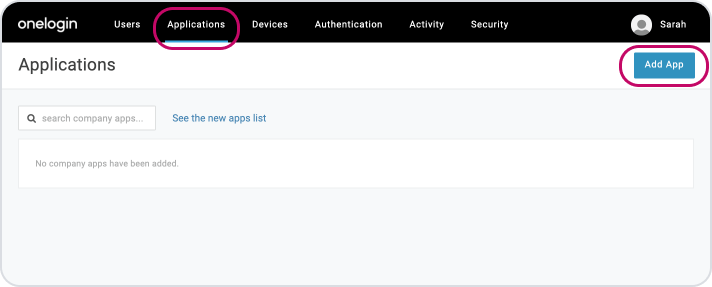
Start by logging into your OneLogin account, head to to 'Applications' from the main menu, then click the 'Add App' button.
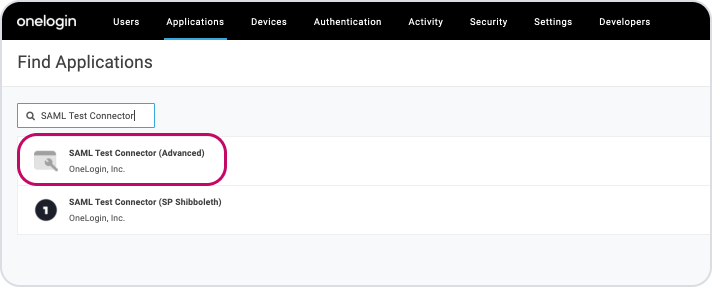
In the search field, enter 'SAML Test Connector' and click the SAML Test Connector (Advanced) option.
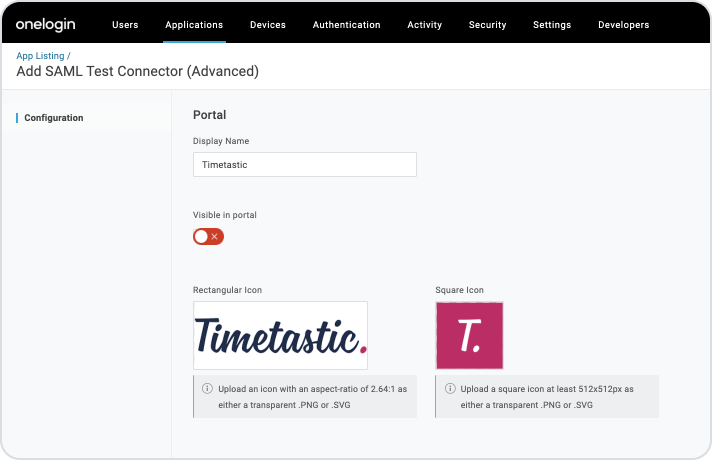
In the Display Name enter 'Timetastic' and upload our logos to make it easy for your users to identify Timetastic within OneLogin. If you'd prefer to hide the SSO option while configuring the App, toggle off 'Visible in Portal' and click 'Save' in top right corner.
(You can download our icons at the very bottom of this article.)
Next, select Configuration from the left hand menu.
To fill out this section, you'll need to grab some security details from your Timetastic account:
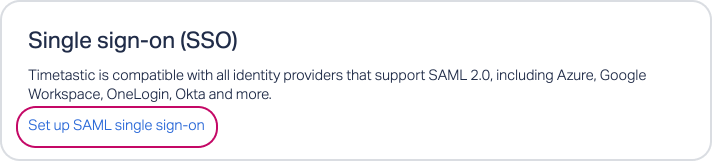
In Timetastic, head to SETTINGS > SECURITY then 'Set up SAML single sign-on'.
Click the 'How to configure your Identity Provider' link to bring up your settings.
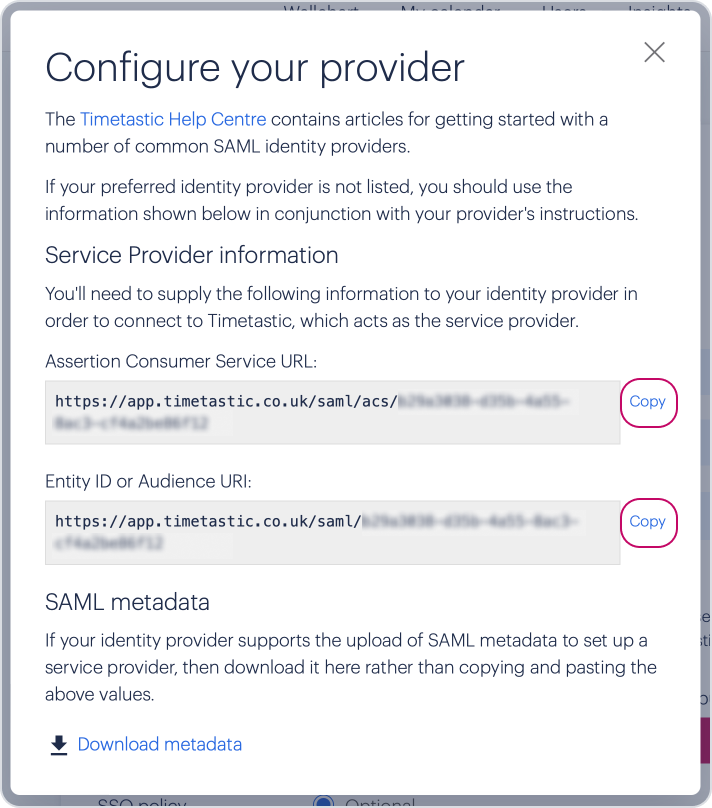
Copy the Assertion Consumer Service URL and paste it into the 'ACS (Consumer) URL' field in OneLogin.
Copy the Entity ID or Audience URI and paste it into the 'Audience (EntityID)' field in OneLogin.
The ACS (Consumer) URL Validator is a regex version of the ACS URL. So you can either convert your actual ACS URL to a regular expression, or use a more permissive version '^https:\/\/app.timetastic.co.uk\/saml\/acs\/\w+$'.
In the Login URL field, enter Timetastic's login URL 'https://app.timetastic.co.uk/account/login'.
Select 'Service Provider' from the SAML initiator drop down
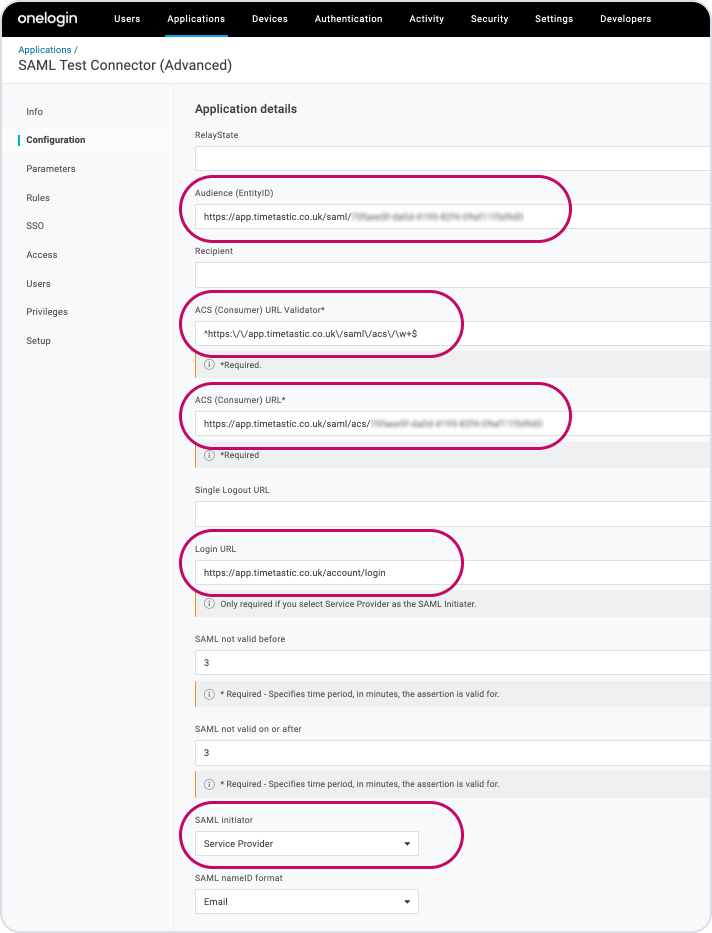
Click 'Save' button in top right corner.
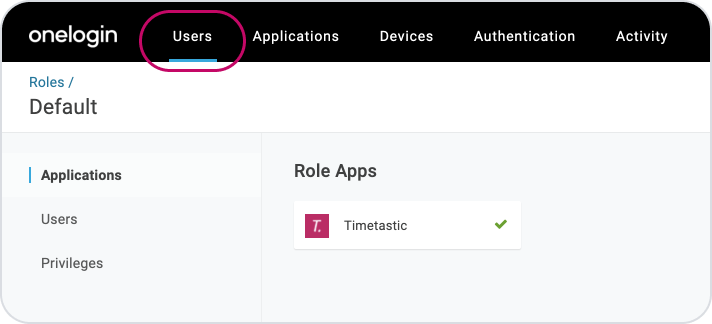
Granting user access
You'll need to give your users (or roles that they are a member of), access to the Timetastic app you've just created. The 'Default' role is automatically granted access to Timetastic, so you should make sure your users are a member of that role, or change the Users and Roles settings however you need to. To edit your options, click Users from the main menu.
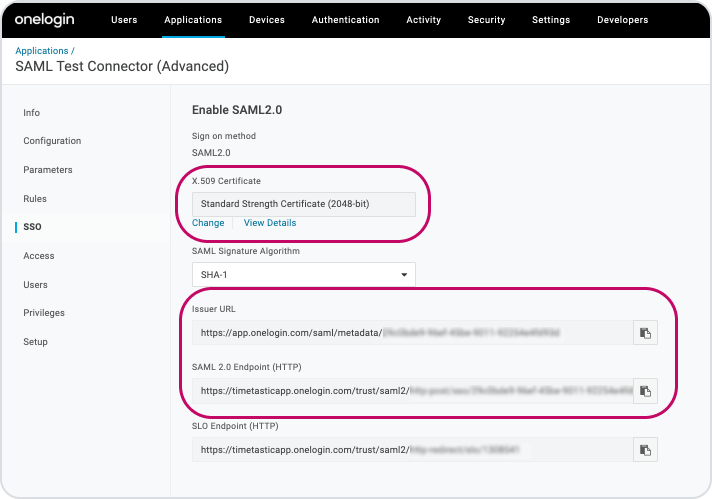
Lastly, before you leave OneLogin, click back to 'Applications' then into the Timetastic app. Select 'SSO' from the left hand menu.
These are the details you'll need to enter in Timetastic.
Step 2. Timetastic setup
Now it's time to head over to Timetastic. Go to SETTINGS > SECURITY. Click the 'Set up SAML single sign-on' link.

Grab those SSO details from OneLogin and in the 'SAML SSO URL' field, paste the 'SAML 2.0 Endpoint (HTTP)' value from OneLogin.
For 'Issuer entity ID', paste the 'Issuer URL' value from OneLogin.
For 'Public certificate', click the 'View Details' link then copy across the details from the 'X.509 Certificate' field (make sure you include "-----BEGIN CERTIFICATE-----" and "-----END CERTIFICATE-----").
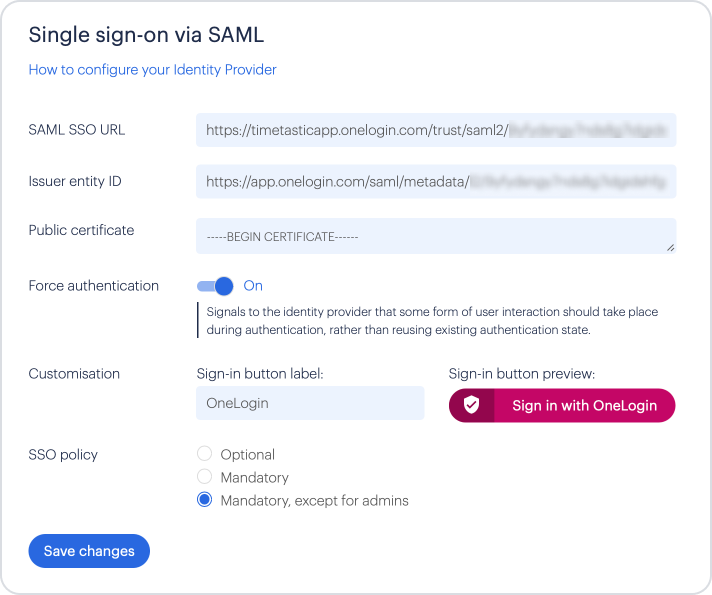
You can turn 'Force authentication' on, if you want users to have to re-enter their identity providers details. (This will only work if the identity providers also support this option)
To customise the Sign-in button, enter something useful, such as 'OneLogin' against 'Customisation'.
We'd recommend you test SSO is working correctly before making it Mandatory.
Once you're happy with your settings, click 'Save Changes', then you're good to go!
Here's a couple of Timetastic logos to upload into OneLogin: